Events can increase profits and sales, build your brand, spread awareness about your company and what you do, and establish connections between you and your customers or community.
Whether the event is a concert featuring Maroon 5 or is an educational conference about marketing software, it’s important to your business and (even if they don’t know it yet) to your customers.
To boost an event, you must have:
– A Facebook business Page (in order to manage your Page, it must be connected to your personal account).
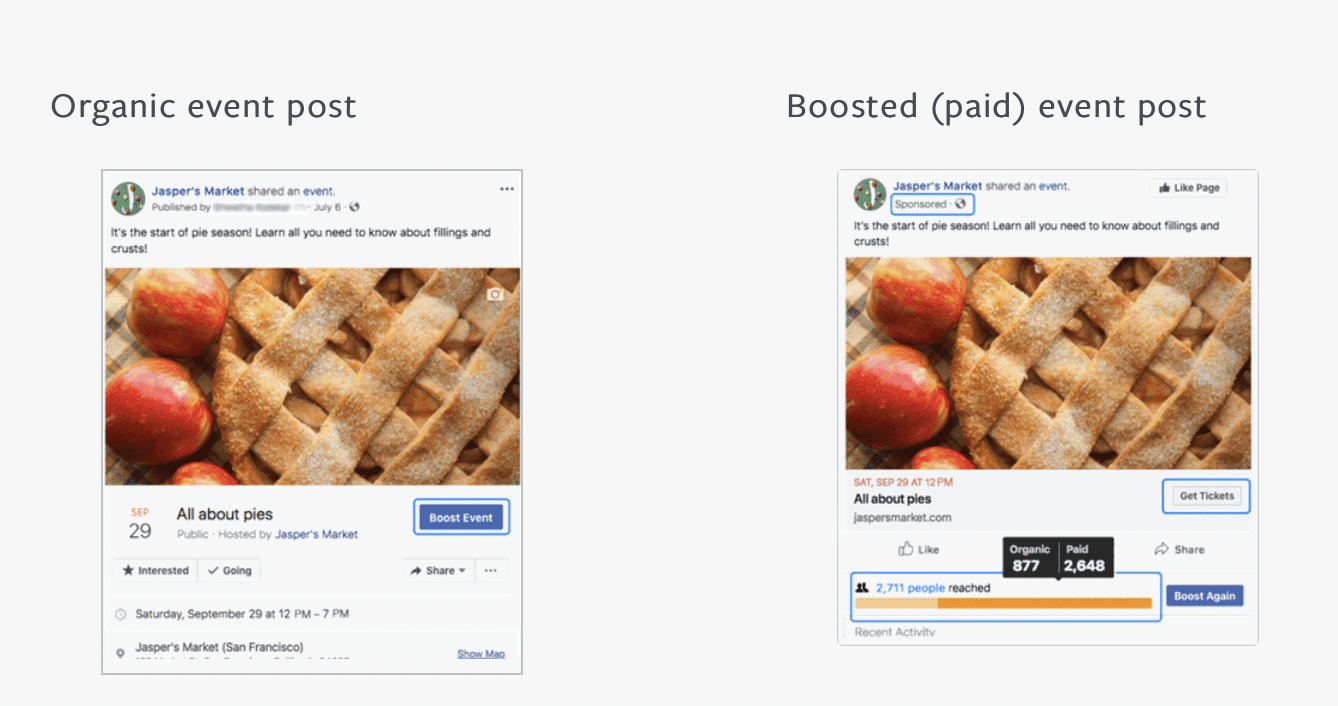
– A published event on your Page that’s eligible to be boosted. Look for the blue Boost Event button.
– The right Page role. If you create a Page, you’ll be the admin by default and can run ads. If you want other people to run ads, they’ll need an admin, editor, moderator or advertiser role.
What does it mean to boost an event?
After you create an event from your Page, you can boost it to help increase awareness, encourage RSVPs and drive ticket sales.
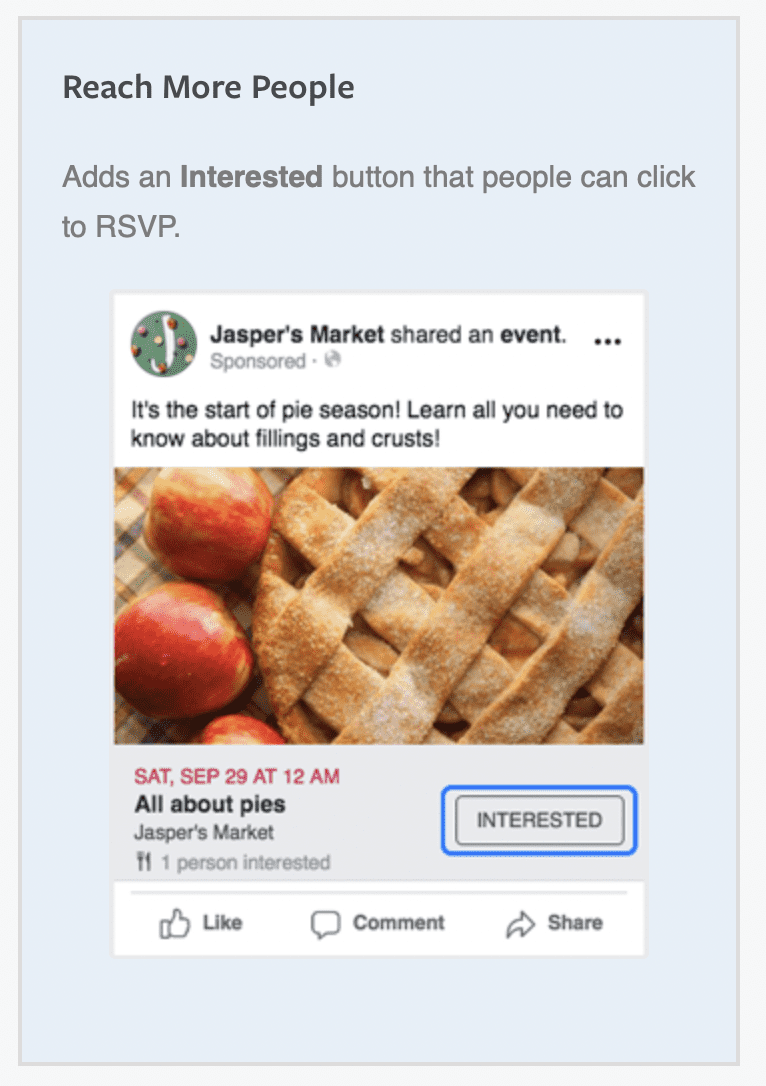
Boosting an event: Turns it into an ad that can appear in people’s News Feed. Adds a Sponsored label at the top of the ad. Lets you include either a “Get tickets” or “Interested” button. In order to run this type of ad, you first need to create an event.
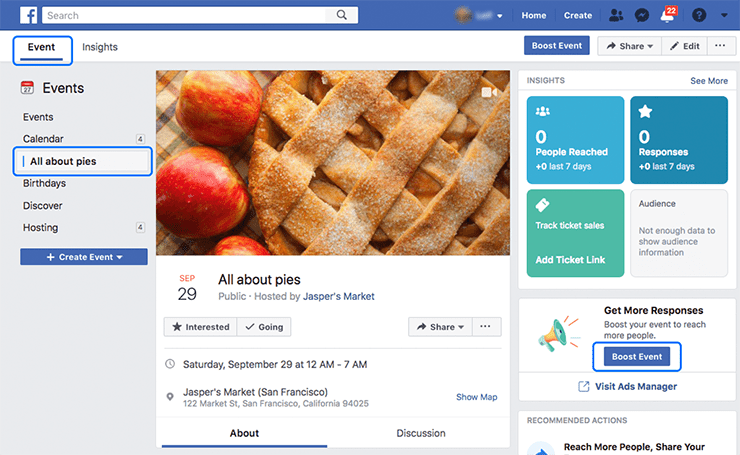
Go to an event you’ve created for your Page and select Boost Event.
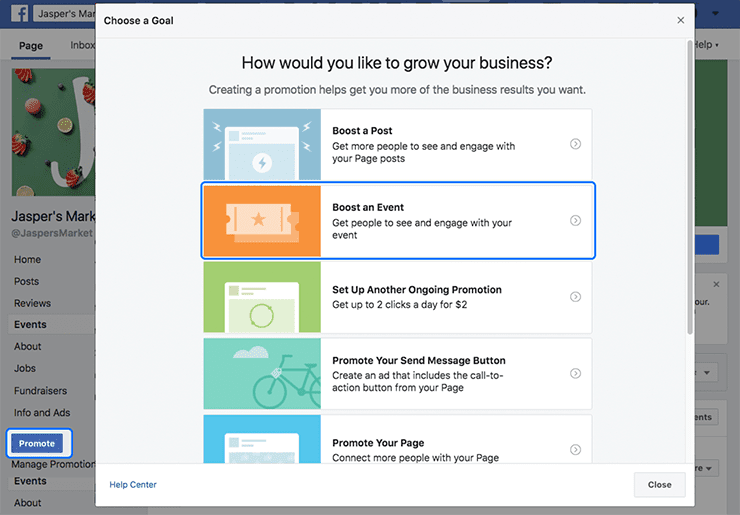
Select the Promote button on your Page, and then select Boost Event as the promotion type.
Some businesses, like Jasper’s Market, may want to focus on increasing ticket sales, while others may want to drive awareness of their event.
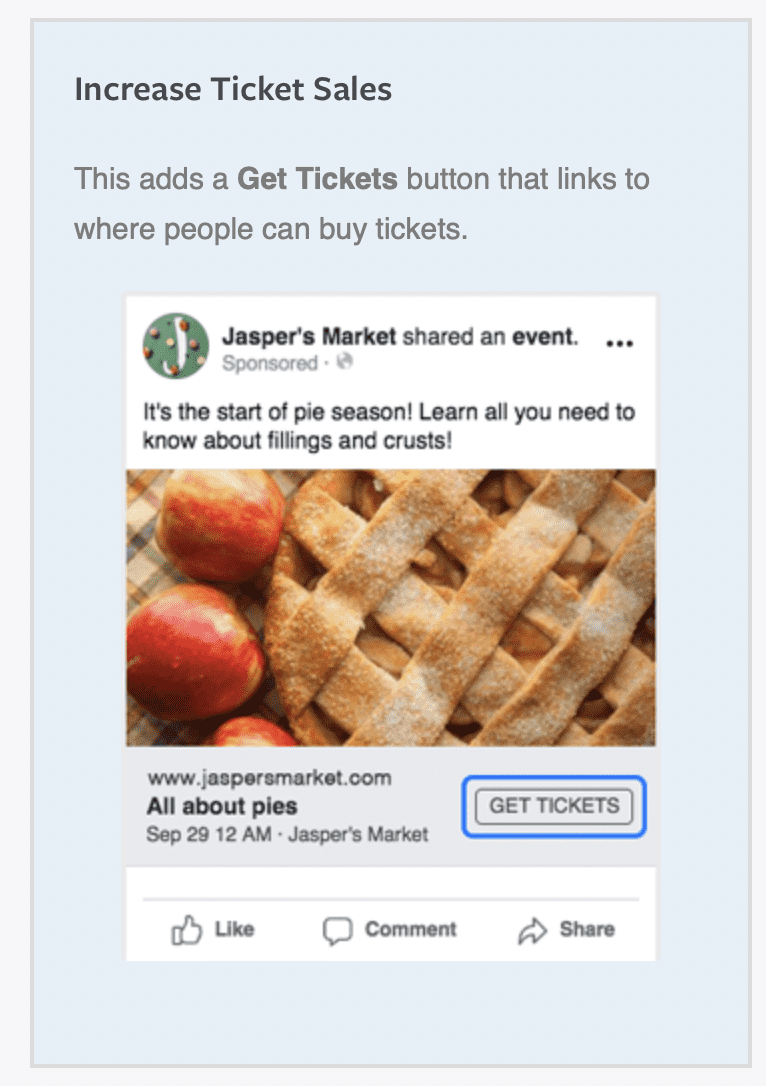
That’s why we offer two objectives (or goals): Increase Ticket Sales (This adds a Get Tickets button that links to where people can buy tickets.) and Reach More People (Adds an Interested button that people can click to RSVP.)
PRO TIP: If you don’t see the two options, it’s because you didn’t include a website URL when you created your event. You can still edit your event and add one if you’re selling tickets and would like to choose between the two objectives.
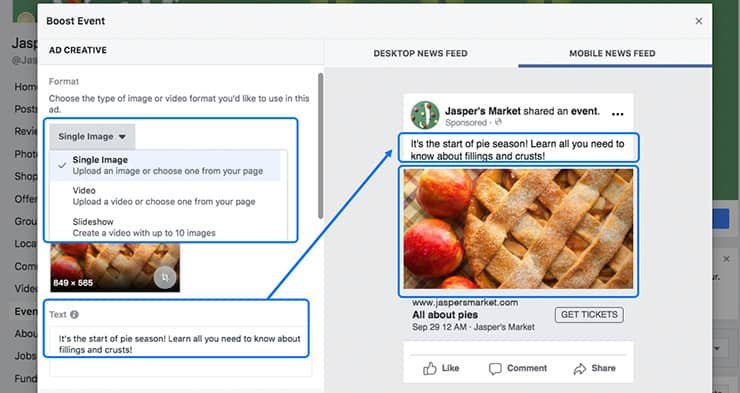
Choose your Ad Creative (in other words, your text and image or video). By default, when you boost an event, the image or video and text you used when you posted the event will carry over to your ad, but you can change them if you like.
Compelling, high-quality images and video can help drive more engagement. At Zesno, we can also help with the Graphic Design.
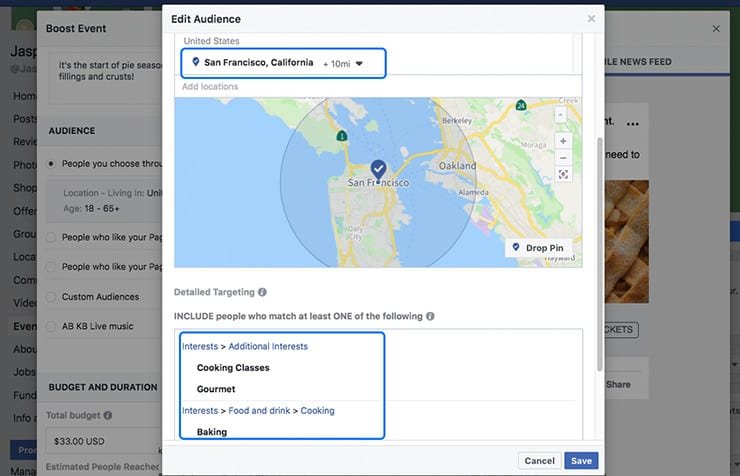
You have several ways to build your audience, whether it’s through interests and geographic location or how they’re connected with your Page. For an event boost, focus on geographic targeting to reach people close enough to make it to your event.
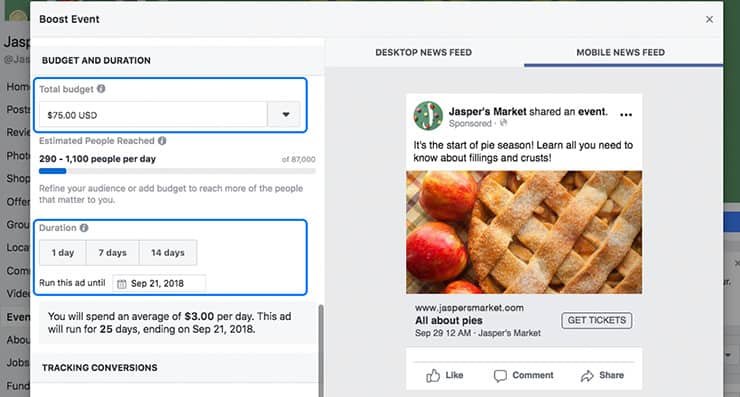
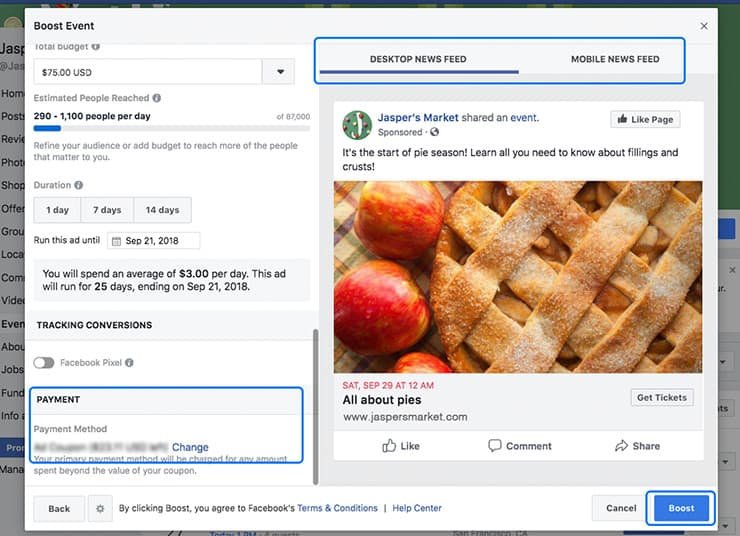
Set your Budget, which is the maximum amount you want to spend on this ad. Based on your budget, you’ll see how many people you’re likely to reach. You won’t be charged more than the budget you set for each ad.
Choose the Duration, how long you’d like your event boost to run. Choose one of the pre-selected time ranges of 1 day, 7 days or 14 days, or choose a date range by clicking on the calendar icon and choosing a date.
Payment Method: The first time you create an ad from your Page, you’ll add payment details. You can change or update your payment details as needed.
Preview what your ad will look like in Desktop and Mobile News Feed. When you’re happy with everything, select Boost.
Your ad is then submitted for review and you should hear back via email and Facebook notifications within 24 hours (if not sooner) on whether your ad is approved.
We believe that even spending a little bit of money to boost your event on Facebook Ads will help you achieve your targets more effectively. You can also put your ads on both Facebook and Instagram platforms to reach more audiences.
